Assisiting in Special Procedures
Corneal scraping
The OA will know the procedure, applications and how to assist the ophthalmologist in corneal scraping in a patient with corneal ulcer.
The test is used to identify of pathogens present in the cornea, their nature and the drugs to which they are sensitive. By plating on culture media or slides by staining and identifying the pattern of drug sensitivity, the pathogens can be eradicated.
Collecting external specimens
Collection of corneal specimens is preferably done by the ophthalmologist. Conjunctival material may be collected by the trained OA from the Microbiology laboratory.
A collection kit must readily be available and include
- Spirit lamp
- Match box
- Kimura spatulas
- Disposable sterile blades
- Spirit in coplin jar
- Clean microscopic slides (preferrably new ones)
- Diamond marking pencil
- Glass marking pencil / pen
- Topical anaesthetic
- Fresh growth media solid
- Transport liquid (2 SP / HBSS)
- Sterile cotton tipped swabs
- Coplin jar containing 95% methyl alcohol
- Coplin jar with cold acetone
- 10% potassium hydroxide dropper
The OA should collect all the above mentioned equipment in advance and keep it ready for the ophthalmologist.
Procedure
- Instruct the patient about the procedure and stress the importance of the test for treatment of ulcers and lesions.
- Explain to the patient that there will be no pain during the procedure, but that there will be some stinging sensation. Stress the importance of scraping for the treatment of their ulcer or lesion.
- The patient is to be seated at the slit lamp if a microscope is to be used for corneal scraping.
- Help the patient to keep the chin on the chin rest and the forehead on the headband. If the scraping is done with the patient lying down, help the patient to do so comfortably.
- Instil a topical anaesthetic of 2% lignocain into the affected area and inform the patient that there will be some stinging sensation.
- Heat the Kimura spatula in a spirit lamp and cool it for one minute.
- Keep the glass slides and medico plates ready (glass slides and medico plates must be obtained from the microbiology lab and stored in a clean container. Fresh ones are to be supplied once in five days.)
- Obtain necessary culture media like Blood Agar, Sabouraud's, and other media as requested by the doctor.
- Keep a glass slide and cover slip ready.
- Gently separate the eye lid of the patient while scraping is being done and ask them to look straight.
After the scraping
- Instil one drop of Homotropine or Atropine
- Ask the patient to wait while the ophthalmologist / microbiologist performs the KOH mount / gram stain
- Once the ophthalmologist prescribes the drugs explain the method of application of eye drops and its proper usage to the patient
- Explain the importance of regular follow up to the patient
Student exercise
Answer the following
- What is corneal scraping?
- What is the procedure for performing scraping?
- How does one assist in corneal scraping?
Fundus Fluorescein Angiography (FFA)
Fluorescein sodium is an ophthalmic dye made of Phthalic Acid and Resorcinol; it absorbs shorter wavelength rays and emits longer wavelength rays.Stages of performing FFA include the Pre-Arterial phase, the Arterial phase, the Arterio-venous phase, the Venous phase, and the Late phase.
Abnormal findings of FFA
- Hypo-Fluorescence in ischaemia, obstruction, media opacities (Dark colour)
- Neovascularisation /causes hyper fluorescence due to leakage (Bright colour)
Preparation
- 5 ml of 10% solution
- 10 ml of 5% solution
- 3 ml of 25% solution
Side effects
- Yellowish discolouration of skin and urine for 12-24 hrs
- Positive urine sugar for 36 hrs
- Dyschromatopsia
Symptoms of toxic reaction
- Nausea
- Vomiting
- Urticaria
- Allergic skin reaction
- Hypotension
- Shock
Assisting in FFA
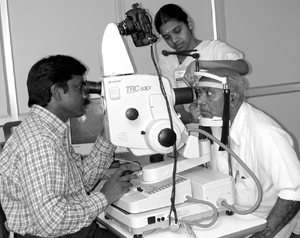
- Explain the procedure to the patient in their own language. Tell them a yellow coloured fluid will be injected through veins which will spread into the body. In the eye angiogram, the dye could show the affected parts. This helps the doctor with their diagnosis. Mention that the test is essential for the proper diagnosis of the eye problem and ask the patient to cooperate for the test (Fig. 5.1).
- Get a written consent form from the patient.
- Explain to the patient that the dye will be injected via an intravenous scalp-vein needle.
- Enquire about any history of previous allergic tendencies. If the patient has any allergic problem, their general physician should be consulted and as per their advice further steps should be taken.
- Explain the risk of allergy and anaphylaxis to the patient.
- Ensure that emergency medicines are ready before injecting the dye.
- Explain to the patient that there will be a yellowish discolouration of skin and urine.
- Inform the patient that they can have positive urine sugar for 36 hours.
- Emphasize to the patient the importance of fixation.
- Ensure full dilatation of the patient's pupil.
- Assist the patient to sit comfortably.
- Gently open the eyelids.
- Help the patient look in the desired direction.
- When the patient enters the room, there will be bright light but when the test starts the lights will be switched off and the patient become fearful. Before switching off the lights inform the patient and ensure that you will be at their side for the entire test if they need help.
Possible emergencies during the procedure
The technician will be concentrating in the process, so the OA who assists must be very alert. She will be near the patient, and has to observe the patient closely to be ready for any emergency.
- Giddiness: The patient may be normal in the beginning of the test, but after a few seconds giddiness may develop. Sometimes in the beginning of the giddiness the patient may think that he or she will be able to manage it but then may become unconscious. Unless the OA is alert, they will not be able to avoid unnecessary problems.
- Vomiting: The patient would have been instructed that two hours starvation is a must for the test and not even coffee or water should be taken. But in spite of that, patient may vomit. Sometimes the patient may vomit in the chin rest itself.
- Allergic skin reaction: If any allergic reaction is found, the OA must immediately inform the technician and doctor. According to the instructions of the doctor further steps will then be taken.
Student exercise
Answer the following
- What is the principle of FFA?
- What are the stages of FFA?
- What are the side effects of FFA?
Ultrasonography
Ultrasonography uses inaudible high frequency sound waves to scan the tissues, which reflect back the echoes, providing information about the integrity of the structure otherwise not visible. USG uses piezo-electric crystals which convert electric impulses into ultrasound waves. The returning echoes from the tissues are received and converted into electric signals which are seen on a monitor, and printed or photographed. Scanning is primarily used to examine optic nerve lesions and tumours.
History
The A scan was first used in 1956 by Mundt and Hughes. The B scan was first used in 1958, by Baum and Greenwood. Karl Ossoinig developed the first standard A and B scans.
Instrumentation
A Scan: This is a time-amplitude scan that produces uni-dimensional image with the echoes plotted as spikes. Their latency indicates their distance and their amplitude indicates their sound reflectivity. Retinal spikes have 100% reflectivity. Five principal echo spikes are present: Cornea, anterior lens, posterior lens, retina, sclera and orbital fat.
B Scan: This is an intensity-modulated scan that gives two dimensional image. A graphic view of tissue helps to provide the location, dimension and configuration of the structure. The B Scan has three orientations; longitudinal, transverse and axial.
Types of scans
- Axial - length biometry A Scan
- Corneal pachymetry A Scan
- Standardised and non-standardised A Scan
- Diagnostic B Scan
Indications
For the anterior segment
- In opaque media: for detection of
- Dislocated / subluxated lens
- Cataract
- In clear ocular media: for diagnosis of iris and ciliary body tumours
For the posterior segment
- In opaque media: detection of
- vitreous haemorrhage
- retinal detachment
- intra ocular foreign body
- In clear ocular media:
- Rumour (size/site/post-treatment follow-up)
- RD
Biometry
- Pre-operative scanning is done to determine IOL power.
- Post operative verification is done to determine the eye length when the refraction differs from surgeon's expectations.
Orbital examination
- Exophthalmos
- Palpable orbital mass
Handling a scan
- Always check the instrument before usage
- Wash and dry hands before working
- Administer 1 drop of 2% lignocaine
- Allow 2 to 5 minutes for the local anaesthetic to act
- Explain to the patient that you will be touching his/her eye with an instrument, but they will not feel it. Ensure them the instrument will not hurt the eye
- Applanate the cornea using the hand held ultrasound transducer probe. This is repeated thrice
- Ask the patient to look straight ahead (for IOL power calculation)
- Record the readings for each eye separately in the patient's chart
Practical usage of B Scan
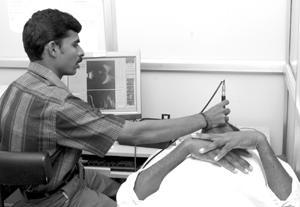
The B scan is performed by the ophthalmologist (Fig. 5.2).
The OA is to
- Explain the procedure and its importance to the patient in their language
- Reassure the patient, if the patient is uncooperative
- Communicate well with the patient to reduce anxiety and clear their doubts
- Be gentle while applanating the cornea for A scan- too much pressure will give inacurate measurement
- Handle equipment with care
- Make the patient lie down comfortably while ophthalmologist performs the B scan
Maintenance
- Keep the instrument covered when not in use
- The instrument can be cleaned with a soft clean cloth
Student exercise
Answer the following
- List the types of ultrasonography.
- What are the indications for ultrasonography?
- What is the practical usage of A Scan?
- How to prepare patient for A and B scan?
Corneal topography
Corneal topography is a method of corneal curvature examination assisted by computer analysis. The corneal topographer consists of a computer linked to a lighted bowl; it projects a series of illuminated rings on to the corneal surface, which are reflected back into the instrument. The reflected rings of light are analysed by the computer and a topographical map of the cornea is generated.
Corneal topography with computerised videokerotoscopy provides colour coded maps of the corneal surface. The dioptric powers of the deepest and flattest meridians and their axes are calculated and displayed.
A series of data points are generated on a placido disk which has been projected on the cornea.
Indications
- To calculate meridians astigmatism associated with contact lens wear
- To diagnose the corneal distortions such as early keratoconus and keratoconus suspects
- To evaluate pre and post operative changes in corneal shape after refractive surgery, corneal grafting or cataract extraction
- To reveal the corneal scarring
- To detect irregularities in corneal shape
Scales
- Absolute scales.
- Relative scales.
- The cool shades of blue and violet represent flatter areas of the cornea.
- The warmer shades of orange and red represents steeper areas of cornea.
- The corneal topographer allows the surgeon formulate a 3D perspective of the corneal shape.
Advantages
- This procedure is painless and brief.
- It is a non contact examination that photographs the surface of the eye using ordinary light.
- The greatest advantage of corneal topography is its ability to detect conditions invisible to most conventional testing.
Assisting in corneal topography
- Help the patient sit comfortably.
- Enter the patient's details in the computer.
- Describe the purpose and nature of the procedure in detail in the patient's own language.
- Adjust the height of the chin rest, to keep the chin and for head against the head band.
- Ask the patient to look at the light in the centre.
- After the topography is over, take the print out and make sure that it is attached to the case sheet.
Uses of corneal topography
Corneal topography is used in the diagnosis and management of various corneal curvature abnormalities and diseases:
- Keratoconus / keratoglobus / pellucid marginal degeneration
- Corneal scars or opacities
- Corneal deformities
- Fitting contact lens
- Irregular astigmatism following corneal transplanting (for suture removal)
- Planning refractive surgery
- Post-operative cataract extraction with required astigmatism
- Suture relaxation in astigmatic kertotomies
Student exercise
Answer the following
- What is corneal topography?
- What are the indications?
- Mention the various colours and their importance.
- What are the types of scales?
- What are the uses of corneal topography?
- Write two advantages of corneal topography over Keratometry
Optical Coherence Tomography (OCT)
This is a non-invasive, non-contact, trans-pupillary imaging technology that can make an image of the retinal structure with a resolution of 10-17 microns using the reflection of light from different structures within the eye.
Procedure
- The beam is focused on retina using a 78 D condensing lens
- An infrared camera is used to view fundus and beam
- Ocular fixation is achieved using a computer-controlled light that fixates the scanned eye or an externally-mounted light on a slit lamp
- Dark colours (like blue and black) reflect areas of minimal optical reflectivity and bright colours (as red and white) represent areas of high reflectivity
Uses
- Studying macular holes
- Studying the Epiretinal Membrane
- CSR (Central Retinopathy)
- Diagnosing ARMD (Age-related macular degeneration)
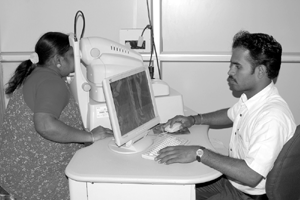
- Determining RNL thickness (Retinal nerve fiber layer) (Fig. 5.3).
Advantages
- Objective
- Quantitative
- No contact with the patient
- High resolution
Disadvantages
- Limited uses in media opacities like cataracts or vitreous haemorrhage.
Preparation of patient
- Explain the procedure to the patient, in their own language.
- Explain the advantages.
- Explain to the patient the importance of steady fixation. If there is no steady fixation it will take a long time to complete the test.
- Seat the patient.
- Adjust stool, table and chin rest for optimal patient comfort.
- Keep their chin over the chin rest and forehead against the head band gently.
- Tell them to steadily fixate on target light.
- Gently separate the eyelids, when the probe beam is focused.
Student Exercise
Answer the following
- What is optical coherence tomography?
- List principle uses, advantages and disadvantages of optical coherence tomography.
- How do you prepare a patient for optical coherence tomography?
Incision and drainage of abscesses
An abcess is a collection of pus. Incision and drainage is indicated whenever there is an abscess. Examples of abscesses include:
- Lacrimal sac abscess
- Meibomian gland abscess
- Orbital abscess
- Dermoid cyst of orbit, which gets infected and forms an abscess
- Lacrimal sac abscess
Symptoms and signs
A patient may have an abscess if they are exhibiting such symptoms as:
- Pain
- Swelling (with or without pus)
- High temperature
- Warmth, tenderness and redness in the affected area
Incision and drainage
- In lacrimal sac abscess a curved incision of 1cm just below the supra-orbital margin and at its temporal extremity is made.
- Orbicularis oculi muscle is split and an opening is made.
- Abscess cavity is cleared of pus.
- A drain is inserted to the lower end.
Assisting in incision and drainage
- Explain the procedure to the patient
- Answer all their questions
- Make sure that patient has started the antibiotics
- The OA should clean the abscess site with betadine solution
- The OA should scrub properly
- Drape the affected area
- Hand over the instruments to the surgeon as and when required
- Help in cleaning and draining the pus
- Apply a pad and bandage to the area
Post-operative treatment
- The incision is dressed for 24 hours
- The incision generally heals in a week
- Appropriate antibiotic are to be started prior to Incision and drainage and continued 5 days post operative
- Analgesics and anti inflammatory are given as needed.
In the ward
- The dressing is to be removed after 24hrs
- Clean the incision with betadine and antibiotic drop is to be applied.
- Make sure that patient is receiving antibiotics and analgesic
Student exercise
Answer the following
- What is an abscess?
- How will you assist in incision and drainage?
Assisting in fitting a prosthetic eye
Prosthesis is an artificial substitute for a missing part, such as an eye, a leg, or a tooth used for functional and/or cosmetic reasons.An ophthalmic prosthesis is necessary because without a conformer or prosthesis in place the eye socket can contract in a matter of days.
Indications
- Following enucleation, evisceration, escentration
- Pthisical eye-contracted eye due to injury or by birth
- Approximately 4-6 weeks after surgery, the patient is ready for first prosthetic fitting.
Ideal prosthesis
An ideal prosthesis is custom-fitted to the exact dimension of the socket. Pre-made or "stock" eye prosthetics are:
- Less satisfactory cosmetically
- Prone to causing more discharge
- Less comfortable
Other options include a cosmetic contact lens for corneal opacities, a scleral lens or cosmetic shell (used when the cornea is irregular).
Instructions to the patient during insertion of ocular prosthesis
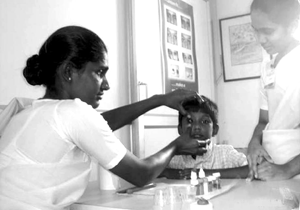
- Wash hands thoroughly and insert the prosthesis wet (Fig. 5.4).
- Facing mirror, hold the artificial eye between the thumb and middle finger so that the upper edge of the prosthesis is upward and back of the prosthesis is towards the socket.
- The second / index finger is used to push on the front surface once the prosthesis is inserted under the upper lid.
- Using the index finger, push upward on the front surface of the prosthesis and release the thumb and middle finger.
- Hold this position for the next step.
- Do not let the prosthesis slide downward.
- Release the free hand holding the upper lid, and pull down the lower lid sufficiently to allow ample opening for the prosthesis to be fully inserted.
- Press inward and upward, while the index finger holds the prosthesis in place.
Care of the prosthesis
The most important instructions for the patient receiving prosthesis concern maintaining proper hygiene:
- The patient is to be told that bacteria exist in the nose, scalp, ears, lashes and face that can cause infection. General cleanliness is to be stressed.
- Bactericidal soap should be used to wash their hands.
- Avoidance of unnecessary wiping of the eye is to be advised. If the patient rubs the eye, he/she has to rub towards the nose with the eye lids closed. Wiping away from the nose may cause the eye to fall out.
- Wash the prosthesis with a mild soap detergent, not a powder cleanser.
- While the prosthesis is wet, rub all surfaces briskly with clean facial tissue.
- Rewash the prosthesis again and insert it into the socket. Cleaning can be done every fifteen or thirty days depending on the socket's condition.
- Never expose the plastic eye to alcohol, ether, chloroform or any solvents. These may damage the plastic beyond repair.
How to remove the prosthesis
- Wash hands thoroughly before removal.
- Gently pull the lower lid downward and remove the prosthesis using an outward and downward motion.
Life and replacement of the prosthesis
A plastic prosthesis will last for five to seven years before it needs to be replaced. Over time, the prosthesis's surface and edges become rough due to salt deposits. The patient should come to the hospital for follow-up visits every six months, and the prosthesis should be polished once a year.
Laser capsulotomy
Posterior capsular opacification (PCO) is the most common long-term complication of IOL surgery. In adults, the time of surgery to visually significant opacification varies from one month to years. In young patients, almost 100% opacification occurs within two years of surgery.
Types
- Fibrous type: Multiple layers of anterior lens epithelium migrates and becomes opaque
- Elschnig type: Migration of equatorial epithelial cells with formation of small pearl like opacities
Principles of Nd Yag Laser
- Photo disruption
- Very intense laser energy is focussed into a small area for a very short period of time producing a hole in the opacity
Pre-laser assessment
- Visual acuity
- Direct and indirect ophthalmoscopy - to visualise fundus
- Retinoscopy
- Slit lamp assessment of opacification
Indications
- BCVA symptomatically decreased as a result of hazy posterior capsule
- PCO preventing clear view of fundus required for diagnostic and therapeutic purposes
- Monoocular diplopia or glare
- Releasing of capsular phimosis
Contraindications
1. Absolute
- Inadequate visualisation of posterior capsule , eg., Corneal scars, corneal edema
- An uncooperative patient
2. Relative
- Known / suspected CME
- Active intraocular inflammation
- High risk for RD
Technique
- Can be done with or without a contact lens
- Use the smallest amount of energy possible with which the posterior capsule can be cut (0.8mj-3.5mj)
- Perform a cruciate opening
- Begin at 12 o'clock periphery
- Progress towards 6 o' clock position
- Cut across at 3 and 9 o'clock position
- Clear up residual tags
The capsulotomy should be as large as the size of pupil in ambient light.
Timing
A YAG Laser posterior capsulotomy is not done less then 6 months after surgery. The procedure is only performed when visual acuity significantly diminishes due to posterior capsule opacification.
Complications
- Elevation of IOP
- Damage to IOL
- Cystoid macular edema
- Retinal detachment - rare, definite risk in myopia patients
Post-laser treatment
- After the Nd YAG laser capsulotomy, 1% apraclonidine is administered topically to contol spikes in IOPs
- Topical steroids for 1 week
Follow-up
- After 1/2 to 1 hour, repeat Refraction
- Review the patient's condition after 4-6 weeks
Preparation of patient
- Describe the purpose and nature of the procedure in detail, to the patient in his / her own language
- Dilate the pupil to about 4 to 5mm, facilitating visualization of posterior capsule.
- No anaesthesia is required.
- If a contact lens is used, administer one drop of 2 % Lignocaine to the eye to be treated.
- Explain to the patient that there will be some burning sensation due to local anesthetic instillation which is transient
- Allow 2 to 5 minutes for the anaesthesia to act
- Explain to the patient that the procedure will be painless
- Explain to the patient the importance of steady fixation.
- Apply 1% aproclonidine five minutes before treatment to avoid post laser spike in IOP
During the procedure
- Reemphasise the importance of steady fixation.
- Adjust the stool, laser table, chin rest and foot rest for optimal patient comfort. Keep patient's chin over chin rest
- Apply the headstrap to maintain forehead position
- Provide a fixation target for fellow eye
After the laser capsulotomy
- Apply 1 % apraclonidine drops to the lasered eye.
- Reassure the patient
- Make sure that refraction is done after half to one hour
- Explain to the patient the application of steroids eye drops
Nd YAG peripheral iridotomy
This is a simple, safe, out-patient procedure done under topical anaesthesia
Indications
- In acute angle closure glaucoma, after the acute attack has been treated
- Prodromal stage of angle closure glaucoma
- Chronic angle closure glaucoma
- Aphakia / pseudoaphakia with pupillary block.
- Malignant glaucoma
- Prophylactic laser iridotomy? in-patients with occludable anterior chamber angles
- Nanophthalmos
- Pigment - dispersion syndrome
- To penerate non-functioning PI.
- Combined-mechanism glaucoma
Counterindications
- Corneal edema
- Corneal opacification
- A completely sealed angle and angle closure by 360 degree peripheral anterior syneche in neovascular glaucoma.
Yag laser iridolenticular synecheolysis for uveitis
Iridolenticular adhesions on pharmacologically undilatable pupils are common in many ocular diseases, especially uveitis. They cause iris bombe and peripheral anterior synechiae, and they interfere with vision and treatment of secondary glaucoma. In all such cases, releasing the adhesions should provide relief.
Procedure
- Topical anaesthetic is applied to the affected eye.
- Patient is seated in front of the Nd YAG machine
- Contact lens may be used
- Laser iridotomy is performed first
- The synechiae are cut by 1 mJ of power towards the surface
- Try to release as much posterior synechiae as possible
Preparation of the patient
- Seat the patient comfortably
- Describe the purpose and nature of the procedure in detail to the patient in their own language. Explain the patient that the procedure will be painless
- Explain to the patient the importance of steady fixation
- Dilate the pupil to about 4 to 5mm, facilitating visualisation of the posterior capsule
- No anaesthesia is required
- If a contact lens is used, administer one drop of 2 % lignocaine to the eye to be treated
- Explain to the patient that there will be some burning sensation due to local anesthetic instillation which is transient
- Allow 2 to 5 minutes for the anaesthesia to act
- Apply 1% aproclonidine five minutes before treatment to avoid post-laser spike in IOP
Instructions for post-laser management
- Continue usual anti-glaucoma medications
- Explain to the patient how to use topical steroids (these are prescribed for a longer period of time than after a laser capsulotomy)
- Emphasize regular follow-up
Pan-retinal photocoagulation
Indications
- Proliferative diabetic retinopathy (high risk and early PDR)
- Rubeousis Iridis due to any cause, Neovascularisation of angle
- CSME (clinically significant macular colour)
- CRVO and BRVO (Sector PRP)
Specifications
- Types of lasers used: Argon blue green, argon green, frequency-doubled Nd / YAG
- Spot size : 500 microns (50mm-500mm)
- Duration : 50-200ms (50-500ms)
- Power : Sufficient to produce a gray-white spot
- Pattern : Around 1500 spots in 2 or more settings
- Extent : From just nasal to optic disc, outside the temporal vascular arcade and 2 DD temporal to macula
Possible complications
- Loss of visual field
- Macular edema
- Pain
- Tractional RD / exudative detachment
Preparation of patient
- Describe the purpose and nature of the procedure in detail, to the patient in his/her own language
- Dilate the pupil to about 4 to 5mm, facilitating visualisation of posterior capsule
- No anaesthesia is required
- If a contact lens is used, administer one drop of 2 % Lignocaine to the eye to be treated
- Explain to the patient that there will be some burning sensation due to local anesthetic instillation which is transient
- Allow 2 to 5 minutes for the anaesthesia to act
- Explain to the patient that the procedure will be painless
- Explain to the patient regarding the importance of steady fixation
- Apply 1% aproclonidine five minutes before treatment to stop post - laser spike in IOP
- Ensure full dilatation of pupil
- Adminster 2% xylocaine to the eye to be lasered
- Re emphasise the importance of steady fixation
- Adjust laser table, chinrest and footrest for optimal patient comfort. Keep patient's chin over chin rest
- Application of head strap to maintain forehead position
- Provision of fixation target for fellow eye
- Gently separate the lids (Fig. 5.5).

Post-laser treatment
- Topical NSAIDS for 2 weeks
- Follow - up after 2 months
- Explain the method of application and usage of the eye drops
- Emphasis on good control of diabetes mellitus
- Explain the importance of exercise and adherence to diabetic diet to control of diabetes
Student exercise
Answer the following
- What are the types of lasers used in Pan-Retinal Photocoagulation?
- What are the steps to be followed in preparing the patient before the treatment session?
Summary
The above mentioned procedures are done in speciality clinics. The OA should have knowledge about these procedures. The OA has to collect the required equipment and other materials and keep them ready for the technician or the ophthalmologist to conduct the special procedures. The OA must explain the procedure to the patient, the importance of the tests and how the results of the tests will help in diagnosing the disease. The OA plays a very important role in assisting the ophthalmologist. It is the duty of the OA to make the patients feel comfortable and cooperative for the procedures.
Key points to remember
- After Corneal scraping the doctor will prescribe drops. The OA must explain the method of application of eye drops and the importance of follow up visits.
- In FFA the OA has to be alert and ready to face emergencies.
- Always assure the patient that the instruments used for testing will not hurt their eye.
- The instruments should be covered when not in use.